|
Dye Sublimation - How it works
The process of Dye Sublimation Photo Printing Explained.
|
All Dye Sublimation Photo Printers use a Special Dye Sublimation ribbon that includes Yellow, Magenta, Cyan and a special overcoating for protection. Due to the technology used, and unlike Inkjet Printers, Black is not required.
The paper is automatically passed through the printer four times. This process can take as little as 45 seconds to create the complete photo. The print speed depends upon the Hi-Ti Model used with the slowest printing in 2 minutes 10 seconds - very quick for such a quality photo!
The example below show a Hi-Ti 640PS printing a photo, although all Dye Sublimation printers work in the same way. The first pass (shown below) is yellow, the printer then feeds the paper out of the back of the printer.
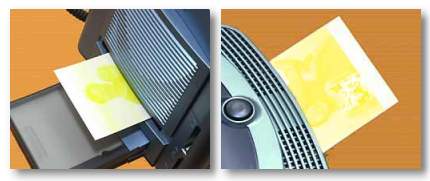
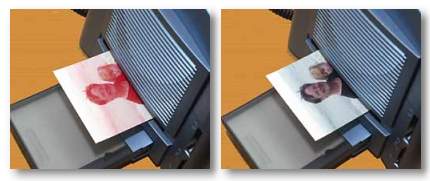
Magenta is the second colour to be printed followed by Cyan, you can actually see the photo "coming to life" as it prints (shown below). Finally an overcoating is applied to the print to protect it. The ribbon inside the unit will print either Matt or Glossy finish depending upon the settings chosen by the user.
Once the photo emerges from the printer it is completely dry, unlike a print from an inkjet printer. The whole process is quite impressive to watch, even having seen it many times before and is ideal crowd puller at an event!
A virtual product tour of the Hi-730PS Photo Printer shows how the printer is used in stand alone mode and connected to a PC.
|

 Save over £70 on