Event Photography - Dye Sublimation Photo Printers - ID & Passport Photo Printers
  Shop - Reviews - Latest News - Knowledgebase - Help & Support - Catalogue - About Us

Home> Professional Dye Sublimation> Kodak 1400 Photo Printer> Installing your Printer


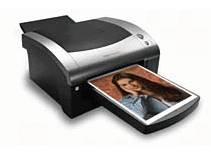
Kodak 1400 - Installing your Printer (2 of 8)
A Step by step guide to installing your Kodak 1400 printer with a PC

Kodak launch their New 805 Dye Sublimation Photo Printer

Kodak's New 805 Photo Printer supersedes the Kodak 1400 Photo Printer.

Delivery Date: 3rd or 4th quarter 2007

New

Installing your KODAK 1400 Photo Printer
There are eight simple steps that need to be followed. Take each step one at a time, read the instructions carefully and you should have no problems at all. If you have any problems during installation then contact us.

Each step is described in detail:

Step 1 - Find a suitable location
Step 2 - Unpack the Printer
Step 3 - Load the Ribbon Carrier
Step 4 - Install the Printer Driver
Step 5 - Connect the USB
Step 6 - Load the Paper Tray
Step 7 - Install the Dust Cover
Step 8 - Make a Test Print


Step 2 of 8 - Unpack the Printer

  • Open the shipping carton.

  • Carefully remove the top foam with the accessories.

  • Lift the printer out of the carton.

  • Remove the printer from the plastic sheet, then place the printer in the desired location.

  • Note: Save the packaging in case you need to ship the printer.


Step 3 - Load the Ribbon Carrier


© Copyright System Insight 1998-2007 - E & OE -All Trademarks Respected - www.systeminsight.co.uk