We are approved by
Trading Standards!
for your peace of mind!
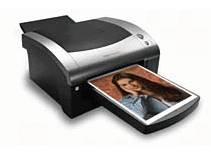
Kodak 1400 - Installing your Printer (Step 1 of 8) A Step by step guide to installing your Kodak 1400 printer
Kodak launch their New 805 Dye Sublimation Photo Printer
Kodak's New 805 Photo Printer supersedes the Kodak 1400 Photo Printer.
Delivery Date: 3rd or 4th quarter 2007
Installing your KODAK 1400 Photo Printer There are eight simple steps that need to be followed. Take each step one at a time, read the instructions carefully and you should have no problems at all. If you have any problems during installation then contact us.
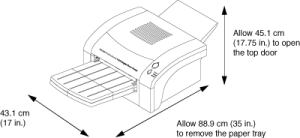
As you look for an appropriate location for the 1400 Printer, keep the following guidelines in mind:
Do not place the printer in locations with high humidity and dust.
Do not expose the printer to direct sunlight or place the printer near heating appliances. Extremely high temperatures may deform the cabinet or cause other damage.
Avoid placing the printer in areas where ventilation ducts, open doors, or frequent passers-by might expose it to debris. Airborne dirt particles can cause image quality problems.
Avoid locations where the printer is likely to be exposed to oily fumes and vapors.
Place the printer on a hard, level, horizontal surface. Ventilation slots and holes are provided on the top and rear of the printer.
Allow the following minimum space around the printer to ensure proper ventilation:
Top: 2 in. (5.08 cm),
Sides: 0.5 in. (1.27 cm),
Rear: 2 in. (5.08 cm),
If the rear dust cover is in place (recommended), then no additional space is required at the rear.
When installing the unit in a system rack, leave space between the unit and the back of the rack.
Protect the printer from dew formation. When the printer is moved from a cold area into a warm area, moisture can condense inside the unit and prevent operation. Allow the temperature to stabilize before use.